How to Build a Curved Nighstand
- Becca Janis
- Aug 29, 2023
- 2 min read
Updated: Dec 14, 2023
I love learning new ways to build furniture! This build was so much fun and I think you will have a lot of fun building it too.
I know when you think of bending wood it sounds scary and hard but I promise it's not as hard as you think! I have a full breakdown of the build on my youtube channel.
I based this design off of one from LuLu and Georgia, only theirs sells for $900! I built this one for $150. It is made of mostly red oak plywood which helps bring down the cost
Here is a detailed breakdown of how I built it. I hope it inspires you to build it or build something you love for your home. Happy building!
Tools
Table saw or Circular saw with Guide
Drill/Driver
Kreg Jig 720 Pro
1 1/4" Pocket Screws
Jigsaw
Kreg Drawer Slide Jig
Orbital Sander
Ratchet strap
Materials
(2) 4x2 3/4" red oak plywood
(1) 1x8x8 red oak board
(1) 4x2 1/4" plywood
Wood glue
Stain - I used Rubio monocoat in intense black for this build
(2) full extension side mount drawer slides 14"
2 cabinet knobs or whatever hardware you want!
Double Sided Tape
1 inch screws
Polyurethane glue
Edge banding
Cut List
Top: 33" x 16.5"
Side: 13.25" x 12" (2)
Legs: 18" x 1.5" x 3/4" (4)
Bottom: 23.5" x 15.5" (5.5" from the bottom of the legs)
Back: 23.5" x 16.25"
Drawer front: 23 2/8" x 9.25"
Drawer sides: 15" x 4" (2)
Drawer front & back: 21" x 4"
Drawer bottom: 21.5" x 15.5"
Steps
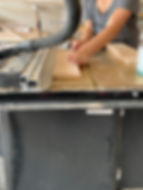
Adjust your table saw or circular saw blade to 5/8" so only a small amount is left when making your grooves (kerf cuts).

2. Starting 2" in from the plywood top start making your kerf cuts. They should be spaced 1/2" apart and there should be 8 cuts. Do this on both sides of the nightstand top.

3. Using a ratchet strap and a square, bend the plywood on both side until it comes to a 90 degree angle. Check it with a square. Apply a small amount of polyurethane glue in the kerf cuts.

4. Attach the sides of the nightstand to the legs using pocket holes and wood glue.
5. Attach the legs and side to the top of the nightstand using pocket holes and screws.

6. Attach the back using pocket holes and screws.

7. Attach the bottom using pocket holes and screws.

8. Optional: iron on edge banding, hardwood edge banding or wood filler to fill the kerf cuts.

9. Trace your drawer front onto the case of the nightstand and cut the curves with a jigsaw.

10. After you've cut the drawer pieces to size, set your table saw or circular saw blade to 1/4" and run all the bottom insides of the drawers through until the groove (dado) is a little over 1/4" thick.
11. Assemble your drawer box using pocket holes and wood glue. Slide the bottom of your drawer box into the groove. Make sure your pocket holes face the front and the back so they will end up being hidden.

12. Attach the drawer front using double sided table and 1" screws from the inside of the drawer box.


